This week we’ve been looking at how DNS works and how to speed your Internet up with namebench.
Click here to learn about DNS.
Click here for part 1 of our namebench series.
Hang in there, we’re almost there.
But, before you can actually enjoy a faster internet connection, there’s one final step to take.
Your old DNS server used to transfer the data from websites to your computer’s DNS cache – this is automatically done because it will speed up the process if you search for the same website again later.
However, you don’t want this old cache slowing you down anymore, because you’ll want your faster and freshly-configured DNS server to look up websites from now on!
You need to get rid of the old cache.
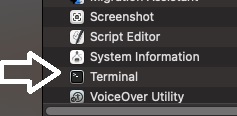
For Mac users, we want to open “Terminal”:
- Click on “Finder”
- Hover over “Applications”

3. Scroll down until you find “Utilities”
4. Search for “Terminal” and click it
5. For the latest version of Mac users, enter: “sudo killall -HUP mDNSResponder” or “sudo dscacheutil -flushcache” (Note: there’s no difference between the two commands)

For Windows users, follow the same steps for looking up a router’s IP address:
Click on “Start” and enter the keyword “cmd” in the taskbar and click on the result.

Command prompt will open.

Type the following line: “ipconfig /flushdns” (Note: there’s a space needed after ipconfig)
![]()
Hit enter

We’re all done and ready to enjoy a faster Internet speed!
To read the complete instructions in one article, click here to check out PixelPrivacy.com.