

A smartphone makes email easier and more convenient than ever to access. You don’t have to be at your desktop or laptop to check your messages. You can easily read, respond to, or compose new email messages anytime you need to.
Your phone will come with a built-in email client app.
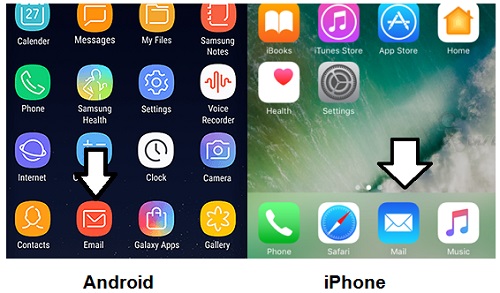
On Android it will be listed as Email or Mail. On an iPhone it will be called Mail. The icon will look like an envelope.
Let’s look at how to set up your email. The process is similar to setting up an email client program like Outlook, LiveMail, or Windows Mail on your PC. Tap the app to open it.
We’ll start with Android and then move on to Apple in part 2.
Depending on which Android phone you have, the Mail app could look a little different. But the basic steps for setting up email remain the same.

On that menu, you’ll want to look for a Settings gear. Tap the gear.

Tap the + symbol to add an account.

The Set Up Account menu will offer the choice of adding some well-known email services. My phone offers Outlook, Yahoo, AOL, Verizon, Gmail, or an Exchange account for corporate email.

If you want to set up an account from one of the service shown, just tap on the icon. Here, I’ll set up a Gmail address. Since I already have a Gmail address, I’ll be adding another.

Then you’ll be asked to put in the email address and password for the account.

You’ll then have to give permission to for the app to access your mail provider.

Normally, that’s all there is to it. Your inbox will be ready to send and receive mail in just a minute or two.

If you aren’t using one of the email providers shown, tap Add Other Account on the Set Up Account screen.

You may be able to just type in the email address and password and hit Sign In.

But if that doesn’t work, you’ll have to tap Manual Setup at the bottom of the screen. You’ll then be prompted to select whether you want a POP3, IMAP, or Microsoft Exchange ActiveSync Account.

You’ll need to set it up with info like the security type, port, and outgoing server. If you don’t have this information, you’ll need to contact your email provider.
You may have to look that information up on your email provider’s website or call their customer service.

When I open my inbox, I have the option of looking at the inbox from each account separately or seeing all of them listed together.

You’ll also notice familiar files like Inbox, Unread, Drafts, and Sent.

To open an email, just tap it.

You’ll note the familiar options to reply, forward, or delete down at the bottom. The same options are available in every kind of mail app, but sometimes you have to look around for them until you get familiar with the layout of the app.

Tap the menu button at the top for more options.

You can move to another file, save the email, mark as spam, mark as unread, or even print.

Swiping left on an email will usually delete it.

While pressing and holding it can give you options like marking it.

To compose a new email message, tap the Compose icon in the bottom right.

Type in the email address of the person you wish to send it to.
Or choose the Contacts icon. You can also attach photos and files by tapping Attach at the top. Hit send when your message is ready to go.

Just as with every app, you’ll have to play around and explore to learn more about it.
In part 2 of this series, we’ll look at setting up email on an iPhone.