

Most people have a smartphone. Not everyone is thrilled about it. Some people love them. Some people tolerate them.
Some people still feel like they were talked into carrying a small, glowing responsibility around in their pocket.
And if we’re being honest, phones can be… a little much.
- Constant notifications
- Apps asking for attention
- Settings that seem to change themselves
- Things happening in the background you didn’t ask for
The good news is this:
You don’t need a new phone. You don’t need to learn everything about it. You just need to adjust a few settings so it behaves more like a tool and less like a needy roommate.
What We’re Going to Do
Over the next several parts, we’ll walk through a handful of simple changes that:
- Reduce noise
- Improve privacy
- Make everyday tasks easier
- And help your phone feel more manageable
Nothing complicated. Nothing risky. Just small adjustments that make a noticeable difference.
What We’ll Cover
Tame the Notifications
Clean Up the Home Screen
Fix Privacy Settings That Actually Matter
Make Calls and Texts Less Chaotic
Battery Tweaks That Actually Help
Back Up Your Photos Without Losing Your Mind
Basic Security for the Device You Carry Everywhere
Tame the Notifications
Because Everything Does Not Need Your Attention
If your phone lights up, buzzes, dings, and generally interrupts you all day… That’s not an accident. Most apps are designed to get your attention. Not just when something important happens. Whenever they can.
Why This Matters
Notifications are useful. But too many of them:
- Break your focus
- Create stress
- Make your phone feel overwhelming
And over time, people tend to do one of two things:
- Ignore everything
- Or constantly check everything
Neither is ideal.
Step 1: Look at What’s Actually Notifying You
Take a moment today and notice:
- Which apps send notifications
- How often they show up
- Whether they’re actually useful
You’ll likely see patterns:
- Shopping apps
- News alerts
- Social media
- “Suggestions” you didn’t ask for
This is your starting point.
Step 2: Turn Off What You Don’t Need
On iPhone:
- Go to Settings
- Tap Notifications
- Tap an app
- Toggle off Allow Notifications

On Android:
- Go to Settings
- Tap Notifications
- Tap App notifications
- Select an app
- Turn notifications off

Start with the obvious ones:
- Apps you rarely use
- Anything promotional
- Anything that feels like noise
Step 3: Keep the Important Ones
You probably still want notifications for:
- Calls
- Text messages
- Calendar reminders
- Maybe a few key apps
The goal isn’t silence.
It’s signal over noise.
Step 4: Use “Do Not Disturb”
Both iPhone and Android have a built-in quiet mode.
On iPhone:
- Settings → Focus → Do Not Disturb
On Android:
- Settings → Sound → Do Not Disturb (location may vary slightly)
You can:
- Turn it on manually
- Schedule it for certain hours
- Allow important contacts through
This is especially useful for:
- Evenings
- Sleep
- Meetings
- Quiet time
Step 5: Adjust Lock Screen Behavior (Optional)
Some notifications don’t need to show up on your lock screen.
You can:
- Hide previews
- Limit what appears
This reduces both clutter and privacy concerns.
What You’ve Just Done
You’ve:
- Reduced unnecessary interruptions
- Made your phone quieter
- Kept only what matters
- Taken back a little control over your attention
Why This Matters
Your phone isn’t just a device. It’s something that sits with you all day. Small changes in how it behaves can make a noticeable difference. Less noise. Less distraction. Less irritation.
Clean Up the Home Screen
Because What You See Every Time You Unlock Your Phone Matters
If your phone feels cluttered, there’s a good chance your home screen is doing most of the work.Every time you unlock your phone, you’re looking at:
- A grid of apps
- Maybe a few folders
- Possibly a widget or two
- And sometimes a mix of things you haven’t touched in months
It doesn’t take much for that to start feeling busy. And when something looks busy, it tends to feel harder to use—even if everything is technically working fine. The goal here isn’t to make your phone look perfect. It’s to make it easier to find what you actually use.

Step 1: Take a Quick Look at What’s There
Before changing anything, just look at your home screen the way it is now.
Ask yourself a couple of simple questions:
- Which apps do I actually use every day?
- Which ones do I recognize but rarely open?
- Which ones make me stop and think, “What is that again?”
You don’t need to fix everything at once.
You’re just getting a sense of what’s useful and what’s just taking up space.
Step 2: Remove Apps You Don’t Use From the Home Screen
This is the fastest improvement you can make.
Removing an app from your home screen does not delete it. It simply takes it out of view.
On iPhone:
- Press and hold the app
- Tap Remove App
- Choose Remove from Home Screen
On Android:
- Press and hold the app
- Drag it to Remove or Remove from Home
The app will still be available in your app library or app drawer.
You’re just clearing the surface.
Step 3: Group Similar Apps Into Folders
Instead of having everything spread out, you can group apps together.
For example:
- “Banking” or “Bills”
- “Shopping”
- “Travel”
- “Utilities”
To create a folder (iPhone & Android):
- Press and hold an app
- Drag it on top of another app
- Release
A folder will be created automatically. You can then rename it and add more apps to it. This keeps things organized without requiring you to remember where everything is.
Step 4: Keep Your Main Screen Simple
Think of your first screen as your “daily use” screen.
This is where you want:
- Your most-used apps
- The things you open without thinking
For many people, that might be:
- Phone
- Messages
- Camera
- Calendar
- Browser
Everything else can live on other screens or in folders. When your main screen is simple, your phone feels easier to use right away.
Step 5: Use the App Library or App Drawer Instead of Clutter
Both iPhone and Android already organize your apps for you behind the scenes.
- iPhone uses the App Library (swipe all the way to the right)
- Android uses the App Drawer (usually a swipe up)
Instead of trying to keep every app visible, let your phone store them there.
When you need something, you can:
- Search for it
- Or find it in the list
This removes the pressure to “organize everything perfectly.”

Step 6: Consider Removing Entire Screens
If you have multiple home screens filled with apps you don’t use often, you can simplify.
On iPhone:
- Press and hold an empty area
- Tap the dots at the bottom
- Uncheck screens you don’t want
On Android:
- Press and hold an empty area
- Swipe through screens
- Remove ones you don’t need (varies by device)
Fewer screens means less swiping and less searching.
What You’ve Just Done
You’ve:
- Reduced visual clutter
- Made your most-used apps easier to find
- Organized what you kept
- Hidden what you don’t need every day
And now, when you unlock your phone, it feels a little more intentional.
Why This Matters
You use your home screen dozens of times a day.
Small improvements there add up quickly. It’s not about making your phone look neat for the sake of it. It’s about making it easier to use without thinking about it.
Fix Privacy Settings That Actually Matter
A Few Things Your Phone Knows That It Doesn’t Always Need To
Smartphones are good at remembering things.
Where you go.
What you open.
What you search.
Most of that is there to make things easier. Maps need your location. Your camera needs access to your photos. Some features genuinely depend on it. But over time, a lot of permissions get turned on simply because it was easier to tap “Allow” than to stop and think about it. This isn’t about turning everything off. It’s about deciding what actually makes sense.
Step 1: Check Location Access
Location is one of the most commonly used—and overused—permissions.
On iPhone:
- Go to Settings
- Tap Privacy & Security
- Tap Location Services
On Android:
- Go to Settings
- Tap Location
- Tap App location permissions

You’ll see a list of apps and how they use your location. For each app, you can usually choose:
- Always
- While using the app
- Never
A good general rule:
- Maps → While using (or Always if you rely on it heavily)
- Weather → While using
- Most other apps → While using or Never
If something surprises you, that’s a good place to make a change.
Step 2: Review Camera and Microphone Access
These are straightforward, but important.
On iPhone:
- Settings → Privacy & Security → Camera / Microphone
On Android:
- Settings → Privacy → Permission Manager → Camera / Microphone
You’ll see which apps have access.
Ask yourself:
“Does this app actually need this?”
For example:
- Video calls → yes
- A shopping app → probably not
If something doesn’t make sense, turn it off.
You can always turn it back on later if needed.
Step 3: Look at Photos Access
Some apps ask for access to your entire photo library.
That’s not always necessary.
On iPhone:
- Go to Settings → Privacy & Security → Photos
- Select an app
You can choose:
- All Photos
- Selected Photos
- None
If an app only needs to upload one photo occasionally, “Selected Photos” is often enough.
On Android:
Photo access is usually grouped under Files and media or Photos and videos in the permission manager.
Step 4: Turn Off App Tracking (iPhone) or Ad Personalization (Android)
These settings control how apps track your activity for advertising.
On iPhone:
- Go to Settings → Privacy & Security → Tracking
- Turn off Allow Apps to Request to Track
On Android:
- Go to Settings → Privacy
- Look for Ads
- Turn off or reset ad personalization (wording varies by device)
This won’t remove ads entirely. It just reduces how much your activity is used to tailor them.
Step 5: Check Which Apps Can Run in the Background
Some apps continue working even when you’re not using them. That can affect both privacy and battery life.
On iPhone:
- Settings → General → Background App Refresh
On Android:
- Settings → Apps → [App] → Battery (or similar)
You can limit which apps are allowed to refresh in the background.
Focus on:
- Apps you don’t use often
- Apps that don’t need constant updates
What You’ve Just Done
You’ve:
- Reviewed which apps know your location
- Checked camera and microphone access
- Limited photo access where needed
- Reduced tracking for ads
- Looked at background activity
You didn’t turn everything off. You just made it more intentional.
Why This Matters
Your phone works best when it has the access it needs. But it doesn’t need access to everything all the time. Most of these settings were turned on quickly during setup. Taking a few minutes to revisit them gives you a better balance between convenience and privacy.
Make Calls and Texts Less Chaotic
Because Not Every Call Deserves Your Attention
If your phone rings and you don’t recognize the number, what do you do?
Most people:
- Let it go to voicemail
- Or stare at it for a second and wonder if they should answer
And then there are the texts:
- Delivery updates
- “Important alerts”
- Messages from numbers you’ve never seen before
Over time, it starts to feel noisy. Let’s clean that up a bit.
Step 1: Silence Unknown Callers (Without Missing Important Calls)
You don’t have to answer every number. You can let your phone filter them for you.
On iPhone:
- Go to Settings
- Tap Phone
- Turn on Silence Unknown Callers
What this does:
- Calls from numbers not in your contacts go straight to voicemail
- Calls still show up in your recent calls list

On Android:
Settings vary slightly, but look for:
- Phone app → Settings → Blocked numbers
- Or Call settings → Unknown callers
Many Android phones also offer spam filtering.
Step 2: Turn On Spam Call and Text Filtering
Most phones now include built-in spam protection.
On iPhone:
- Spam filtering is more limited, but you can:
- Go to Settings → Messages
- Turn on Filter Unknown Senders
This separates unknown texts into a different list.
On Android:
- Open the Phone app
- Go to Settings
- Look for Spam and Call Screen or similar
- Turn on spam filtering
This helps reduce unwanted calls before they even reach you.
Step 3: Clean Up Your Contacts
A messy contact list can make everything harder.
Take a few minutes to:
- Remove duplicates
- Update names
- Delete contacts you no longer need
Why this matters:
- It helps your phone recognize calls correctly
- It makes searching easier
- It reduces confusion when someone calls or texts
You don’t have to organize everything perfectly.
Just clean up the obvious ones.
Step 4: Control Message Notifications
Not every text needs the same level of attention.
For example:
- A message from a family member → probably important
- A promotional text → not so much
On iPhone:
- Open a conversation
- Tap the contact name
- Choose options like Hide Alerts
On Android:
- Open a conversation
- Tap the menu or contact
- Adjust notification settings
You can quiet specific conversations without turning everything off.
Step 5: Block Numbers When Needed
If a number keeps contacting you and shouldn’t be:
On iPhone:
- Open the call or message
- Tap the number
- Scroll down and tap Block Caller
On Android:
- Open the call or message
- Tap the number
- Choose Block or Report spam
This stops future calls and texts from that number.
Step 6: Don’t Engage With Spam
If you get a suspicious message:
- Don’t reply
- Don’t click links
- Don’t try to “unsubscribe”
Responding can confirm your number is active, which can lead to more messages. Silence works better than arguing with a robot.
What You’ve Just Done
You’ve:
- Reduced unwanted calls
- Filtered unknown messages
- Cleaned up your contacts
- Controlled which notifications matter
- Blocked repeat offenders
Your phone should now feel a little less chaotic.
Why This Matters
Your phone is one of the main ways people reach you. That’s useful. But it doesn’t mean everyone deserves equal access to your attention. A few small settings can make a big difference in how your phone feels day to day.
Battery Tweaks That Actually Help
Not Magic Tricks — Just Smarter Settings
If your phone battery doesn’t last as long as it used to, you’re not imagining it.
Over time:
- Apps do more in the background
- Screens get brighter
- Notifications pile up
- And batteries naturally wear down
There’s no single setting that fixes everything. But there are a few adjustments that, together, can noticeably improve how long your phone lasts.
Step 1: Check What’s Using Your Battery
Before changing anything, it helps to see where your battery is going.
On iPhone:
- Go to Settings
- Tap Battery
On Android:
- Go to Settings
- Tap Battery
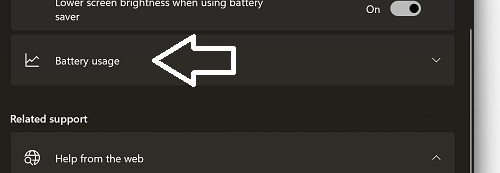
- Look for Battery usage
You’ll see a list of apps and how much battery they use. This answers a very useful question: “What’s actually draining my battery?”
Step 2: Reduce Background Activity
Some apps keep working even when you’re not using them.
That can drain battery quietly.
On iPhone:
- Go to Settings → General → Background App Refresh
- Turn it off for apps that don’t need it
On Android:
- Go to Settings → Apps → [App] → Battery
- Set to Restricted or similar (wording varies)
Focus on:
- Social media apps
- Shopping apps
- Anything you don’t open often
Step 3: Adjust Screen Brightness
Your screen is one of the biggest battery users.
Two simple changes help:
Turn on Auto-Brightness
On iPhone:
- Settings → Accessibility → Display & Text Size → Auto-Brightness
On Android:
- Settings → Display → Adaptive brightness
This adjusts brightness based on your surroundings.
Lower Brightness Manually When You Can
If your screen is always at full brightness, lowering it even a little makes a difference.
Step 4: Reduce Screen Timeout
This controls how long your screen stays on when you’re not using it.
On iPhone:
- Settings → Display & Brightness → Auto-Lock
On Android:
- Settings → Display → Screen timeout
Setting it to a shorter time (like 30 seconds to 1 minute) helps conserve battery.
Step 5: Turn Off Features You Don’t Use
Some features run quietly in the background. If you don’t use them, turning them off helps.
Examples:
- Bluetooth (when not in use)
- Location services for certain apps
- Wi-Fi scanning or nearby device features
You don’t need to turn everything off.
Just be aware of what’s running.
Step 6: Use Low Power Mode When Needed
Both iPhone and Android have a built-in power-saving option.
On iPhone:
- Settings → Battery → Low Power Mode
On Android:
- Settings → Battery → Battery Saver
This reduces:
- Background activity
- Visual effects
- Some performance
It’s especially helpful when your battery is getting low and you need it to last.
Step 7: Keep Your Phone Updated
Software updates often include:
- Battery improvements
- Bug fixes
On iPhone:
- Settings → General → Software Update
On Android:
- Settings → System → Software update
You don’t have to update immediately every time.
Just don’t ignore updates for long periods.
What You’ve Just Done
You’ve:
- Identified what’s using your battery
- Reduced unnecessary background activity
- Adjusted screen settings
- Limited features you don’t need
- Used built-in power-saving tools
None of this is dramatic.
But together, it adds up.
Why This Matters
Battery life affects how your phone feels all day. When it’s constantly running low, everything feels a little more frustrating. A few small adjustments can make your phone feel more reliable again.
Back Up Your Photos Without Losing Your Mind
Because These Are the Things You Really Don’t Want to Lose
I take a lot of photos.
Not in a professional, carefully-planned way. Just everyday life. Cats, food, something funny, something I’ll probably forget if I don’t snap a picture. And like most people, I don’t always think about where those photos are going… until I do.
Usually that thought shows up at the worst possible time:
“What would happen if my phone stopped working right now?”
That’s when it hits you. Those photos aren’t just pictures. They’re:
- Family moments
- Trips
- Things you meant to remember
- Things you didn’t realize would matter later
So this part isn’t about being overly technical. It’s about making sure those photos are safe without turning it into a project you’ll never finish.
Step 1: Check If Your Photos Are Already Backing Up
A lot of phones are already backing up photos—you just may not be sure where.
Common options:
- iPhone → iCloud Photos
- Android → Google Photos (or sometimes another service depending on the device)
On iPhone:
- Go to Settings
- Tap your name at the top
- Tap iCloud
- Tap Photos
- Check if Sync this iPhone is turned on

On Android (Google Photos):
- Open the Google Photos app
- Tap your profile icon
- Look for Backup is on
If it’s already on, that’s good news.
Now we just make sure it’s set up the way you expect.
Step 2: Understand What “Backup” Actually Means
This is where people get tripped up.
When your photos are backed up:
- They’re stored on your phone
- And copied to the cloud
So if something happens to your phone, your photos are still available when you sign in on another device.
That’s the goal.

Step 3: Make Sure Backup Is Actually Working
Just because it’s “on” doesn’t always mean everything is current.
Check:
- Are recent photos showing up in the cloud app?
- Is there a message saying backup is paused?
- Is it waiting for Wi-Fi?
If you haven’t connected to Wi-Fi in a while, backup may be delayed.
Opening the app and letting it run for a bit can help it catch up.
Step 4: Know Your Storage Limits
This is the part that sneaks up on people.
Cloud services have limits.
- iCloud → smaller free storage
- Google Photos → shared storage with your Google account
If you run out of space:
- Backups may stop
- New photos may not be saved
Check your storage in settings or the app and decide:
- Is the free space enough?
- Or do you need a little more?
You don’t need a huge plan for most people.
Just enough to keep things current.
Step 5: Decide If You Want a Second Backup
If photos really matter to you, having one backup is good.
Having two is better.
That might look like:
- Cloud backup + occasional download to a computer
- Cloud backup + external hard drive
You don’t need to do this constantly.
Even once in a while gives you another layer of protection.
Step 6: Be Careful When Deleting Photos
This is an easy mistake.
If your photos are syncing:
- Deleting a photo on your phone
- May also delete it from the cloud
If you want to keep something long-term:
- Make sure it’s backed up
- Consider saving a copy elsewhere before deleting
What You’ve Just Done
You’ve:
- Checked whether your photos are being backed up
- Understood where they’re stored
- Made sure backup is actually working
- Reviewed your storage
- Considered a second backup
And most importantly, you’ve taken a little control over something that actually matters.
Why This Matters
Phones can be replaced. Photos can’t. And this is one of those areas where a small amount of setup now prevents a lot of regret later.
Basic Security for the Device You Carry Everywhere
A Few Settings That Matter More Than You Think
Your phone goes with you everywhere.
It holds:
- Your messages
- Your photos
- Your email
- Your accounts
- Your saved logins
In many ways, it’s the most personal device you own. And because it’s so familiar, it’s easy to assume it’s already secure enough.
Most of the time, it is. But there are a few basic settings worth checking to make sure you’re covered if something unexpected happens.
Step 1: Make Sure You’re Using a Screen Lock
This is the simplest layer of protection.
If your phone is lost or picked up by someone else, this is what stands between them and your information.
You can use:
- A PIN
- A passcode
- Fingerprint
- Face unlock
On iPhone:
- Settings → Face ID & Passcode (or Touch ID)
On Android:
- Settings → Security → Screen lock
If you’re using something very simple (like a short PIN), it may be worth strengthening it slightly.
You don’t need to make it complicated.
Just not obvious.
Step 2: Turn On “Find My Phone”
If your phone is ever lost, this is what helps you:
- Locate it
- Lock it
- Or erase it remotely
On iPhone:
- Settings → [your name] → Find My → Find My iPhone
On Android:
- Settings → Security → Find My Device
Make sure it’s turned on.
This is one of those settings you hope you never need.
But if you do, you’ll be glad it’s there.
Step 3: Keep Your Phone Updated
Just like your computer, your phone receives updates that fix problems and improve security.
On iPhone:
- Settings → General → Software Update
On Android:
- Settings → System → Software update
You don’t have to install every update immediately.
But try not to fall too far behind.
Step 4: Be Careful With Public Wi-Fi
Public Wi-Fi is convenient.
But it’s also shared.
If you’re using it:
- Avoid logging into sensitive accounts
- Avoid entering payment information
- Stick to basic browsing if possible
If something feels important, it’s safer to wait until you’re on a trusted connection.
Step 5: Only Install Apps You Actually Need
Every app you install:
- Takes up space
- May request permissions
- May run in the background
Before installing something, ask:
“Do I actually need this?”
Fewer apps means:
- Less clutter
- Fewer permissions to manage
- Fewer potential problems
Step 6: Review App Permissions Occasionally
We looked at this earlier in the series, but it’s worth revisiting.
Every now and then, take a look at:
- Location access
- Camera access
- Microphone access
If something doesn’t make sense, turn it off.
You can always turn it back on later if needed.
Step 7: Know What to Do If Something Feels Off
If your phone starts behaving unusually:
- Apps opening on their own
- Strange messages being sent
- Settings changing without you
Take a step back and:
- Restart the phone
- Check installed apps
- Review account activity
- Change important passwords if needed
You don’t have to assume the worst.
Just pay attention.
What You’ve Just Done
You’ve:
- Secured access to your phone
- Enabled a way to find it if lost
- Kept your system up to date
- Reduced unnecessary risk
- Reviewed how apps behave
All with a few simple steps.
Why This Matters
Your phone isn’t just a device. It’s where your digital life lives day to day. You don’t need to lock it down completely.
You just want to make sure it’s not wide open.