

Yesterday, we started to create a video using the built-in movie maker in the Windows 10 Photos app. (Click here to learn about that.)
Today we’re going to learn how to edit and add effects to your video. We’ve already created our video.
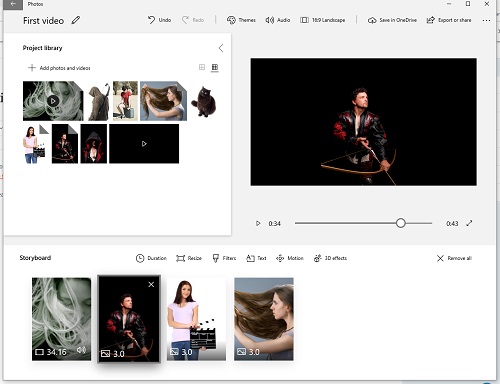
Let’s look at our Storyboard. You’ll see that the length of each video and picture is displayed on the image.

To change the length of a clip or image, click on it and select Trim.

Drag the handles to adjust the length.

Click Filters to choose from several options.

Choose Resize to shrink to fit or remove black bars on photos and show full screen.

Click on Text to see your options for adding text styles.

In the right panel, type your text, choose an animated style and a position for the text. Then click Done.

Your changes will live update as you make them.

You can also add Camera motion.

Choose from several pre-set motions. You can test them out by playing the video in the center pane. Click Done when you find the one you like.

You also have the option to add 3D effects.

There are quite a few options to choose from including lights, falling leaves, flying bats, balloons, and other fun stuff. Some of them are Premium effects and must be purchased but you can certainly ignore that and work with the free stuff.

There’s also an extensive library of 3D images.

Here’s a 3D leaf falling leaf effect applied. (It even has sound.)

At the top, you can also choose from several themes.

Picking a theme will unify your effects, music, and text styles.

Clicking Audio allows you to choose between music or a narration track. Sadly not both. You can choose from pre-selected music or import your own.

Choose between two formats and landscape or portrait orientation for the video.

When the video is finished, you can save to OneDrive or export.

Choose between three file sizes.

This is a fun little app with a lot of options. Play around with it and let me know what you think.
Thanks for highlighting this terrific tool.