
There’s a new addition to Windows 10 that you might not have tried out yet: Paint 3D. If you’re up-to-date, it should be installed on your Windows 10 PC. If you don’t see it, try going to the the Windows Store and searching for Paint 3D. To find on your PC, Type Paint 3D into the search box in the Start Menu.

Here’s a look at the screen you’ll see when you open it for the first time.

You’ll have options to create a new project, open an existing image, or paste an image from the clipboard.

You’ll also have the option to watch an instructional video on using the 3D functions. Untick the Show welcome screen box to default open to a new document.

Let’s start with creating a new image.

Click the menu button in the top left.

You’ll see some familiar options like starting a new image or opening a recent one. Plus options for saving and printing.

At the top, you’ll see some familiar options like crop & brush selection.

Choose Brushes and a panel will open on the right offering you choices of Marker, pen, oil brush, watercolor, pixel pen, pencil eraser, crayon, spray paint, and a fill with paint option.

Here are some examples of freehand lines drawn with those brushes look like.

You can adjust the thickness of the lines with the slider bar.

Beneath that, a drop-down menu lets you choose between matte, gloss, dull metal, and polished metal surfaces.

Below that is where you’ll make your color choices. Use the eye-dropper to select a color from the image you’re working on or pick from the palette.

Or click the + button to choose new colors.

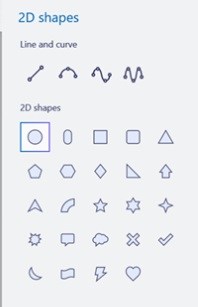
Choose 2D shapes to pull up the familiar shapes of the old MS Paint.

You can choose between shapes and line and curve drawing.
Click the Canvas and Text icons to add text or change adjust the size of the image.

Now that we’ve looked around the more familiar controls, it’s time to take a closer look at some of the 3D features that give Paint 3D its name. We’ll pick that up tomorrow.
2 thoughts on “Paint 3D: Part 1”